An introduction to the Microsoft Bot Framework
Blog|by Jamie Maguire|22 November 2018
In an earlier blog post we looked at how you can use the Cognitive Services stack to surface insights in social media data. In this blog post we change gears and look at the Microsoft Bot Framework, the technology and its key components. We also look at how you can build a simple bot and explore some other use cases for the Bot Framework.
Technology overview
In September, Microsoft released version 4 of the Bot Framework and was marked as stable and ready for production use. I had been doing a lot with BFv3 over the last 6 months and while a lot of the concepts and namespaces are similar, BFv4 in some respects was a complete departure from everything that I had learned in BFv3. The overall process of building a chatbot was the same though which typically involves:
- planning and design the types of conversation you want your bot to have
- adding services such as LUIS for Language Understanding
- building components to handle the orchestration of conversations
- testing with the Bot Framework Emulator
- publishing to Azure so others can use your bot!

The process of building a chatbot. Source: Microsoft
Bots are effectively web services that implement conversational interfaces that facilitate the sending/receiving of messages and events. Using a language of your choice such as C# or JavaScript, you can create messages that can contain text, images and other rich media to help guide the user through conversations in an intelligent manner. These conversations can take place over different types of interface which brings us onto Channels.
Channels
Users can communicate with your bot over a Channel. A Channel is a connection between your bot and a communication app such as Skype, Slack, Facebook Messenger or just website (called Web Chat in the Bot Framework).
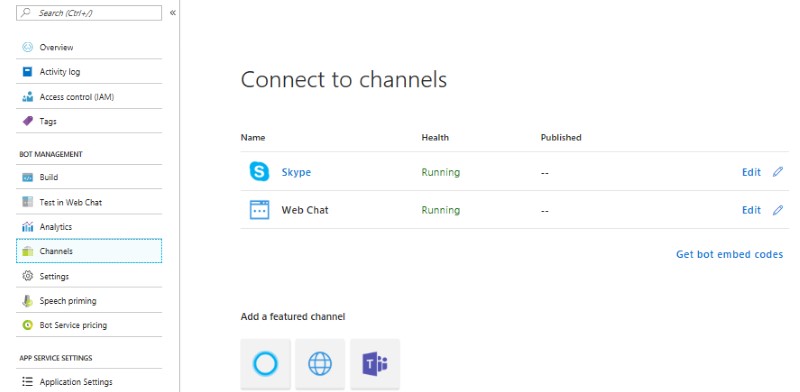
Setting up Channels is easily done through the Azure portal. Source: Microsoft
When you’ve built the core logic of your bot, it can be publishing to any one of these Channels (note each has their own distinct behaviours), one of the most common ways to deploy your bot is over a website. Setting up Channels is easily done through the Azure Portal which you can see in the image above!
Dialogues
When building your bot, you’ll want it to say more than just “hello”. To help you manage simple and more complex forms of conversation flows, you use a collection of Dialogues. These are structures in your bot that you build (regular C# classes) and are designed to perform operations in a specific order. They can be invoked in various ways, for example, they can be invoked when LUIS identifies an intent, to a user response, or even by other dialogues.
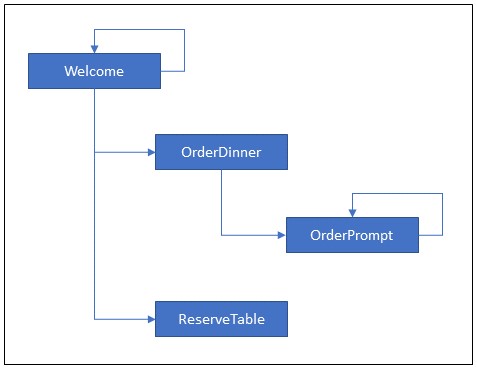
Dialogue structures. Source: Microsoft
By encapsulating your conversational logic into one or more dialogues and linking them together, you make it easier to code and maintain your chatbot source code, not to mention make it easier to model and understand!
Media and Cards
When designing and building conversations, sometimes you want to display more than just text to users that interact with your bot. This is where media and Cards come into play.
With the Bot Framework, you can inject rich user controls such as Buttons, Images, Carousels and menus which users can engage with to help them navigate their way through the conversation flow. You can present multiple choice selections, video and much more, the type of cards you need, or use are ultimately determined by the types of conversation you’d like your bot to have.

With the Bot Framework, you can inject rich controls for your users. This is where Media and Cards come into play. Source: Microsoft
Some of the main types of card you can develop can include, but are not limited to:
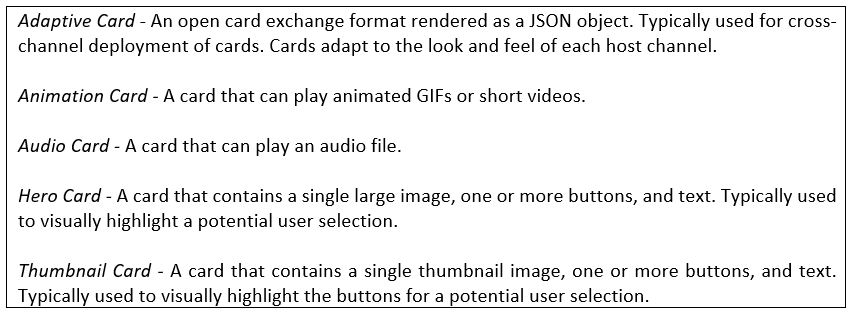
Source: Microsoft
After you’ve designed your conversational logic into one or many Dialogues, another great way you can augment your bot’s intelligence is by introducing other AI services such as LUIS or APIs from the Microsoft Cognitive Services stack. Adding a service like LUIS lets you create logic that can identify the user’s initial intent during their first interactions with your bot and can act as a “switchboard” into specific dialogues you might have created. I wrote about LUIS in an earlier blog post which you can find here!
Bot Framework Emulator
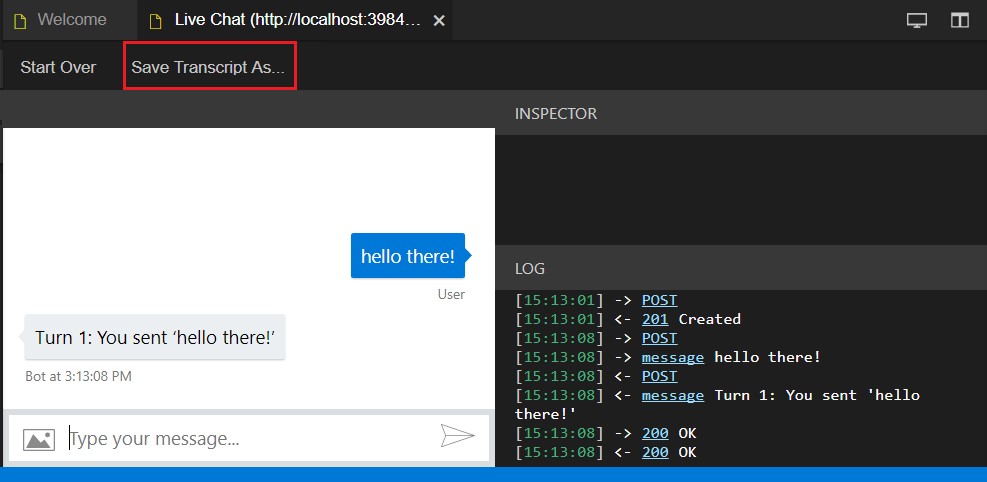
When building your bot during development you don’t always want to publish it to Azure to test it; this is where the Bot Framework emulator comes into play.
Version 4 of the emulator has evolved quite a bit from its predecessor. It contains additional configuration options, lets you examine the underlying services your bot has through the Bot Explorer and much more.
After you run your bot application in Visual Studio, you fire up the emulator and point it to your bot URL, at which point, you can start to chat with your bot.
The Bot Framework Emulator. Source: Microsoft
The emulator lets you inspect the data being passed between you and your bot, and debugging your bot code is just like any other application. You can find out more about the new features that ship with the emulator here.
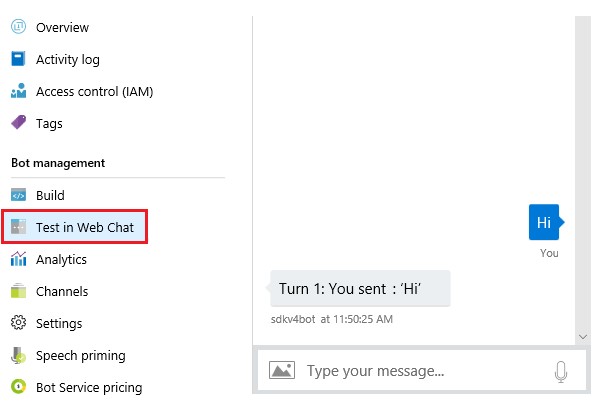
Occasionally, you’ll want to see how your bot behaves on a website. If your bot has been deployed to Azure, you can easily do this using the Azure web chat interface!
The Azure web chat interface. Source: Microsoft
Building a Simple Bot
Now that we’ve touched on some of the higher-level concepts it’s time to look at building a basic bot. This bot will be VERY simple and will let you enter anything you like, it will then echo it back to you. While the bot does this, it will track how many messages (or Turns) you’ve taken and also display that information in the chat window.
You’ll need Visual Studio 2017 to open the project and .NET Core 2 installed.
I won’t detail every line of code in this blog post, as full source code for this bot can be found here but the key components to look at are as follows:
BotConfiguration.bot – this contains the endpoints for the bot, you load this config file into the emulator.
SimpleWithCounterBot – this is the underling logic that powers the bot. Each time a message is sent by the user, the OnTurnAsync method on this class is invoked. You can see the key logic here, along with some comments that detail the underlying logic.

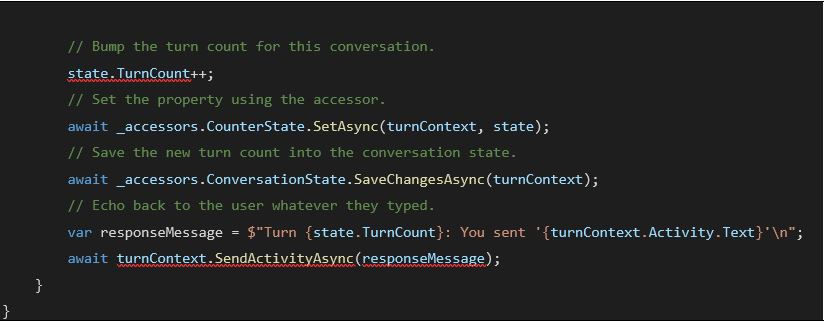
One thing you’ll notice is there is a state variable is also created, this lets the bot store the number of times to user has sent a message.
Bot Accessors
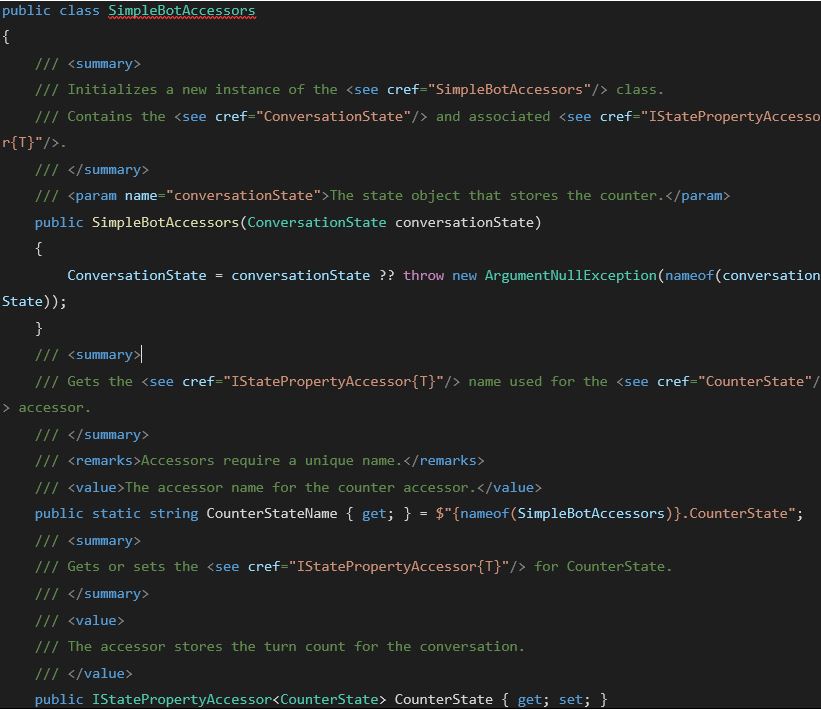
A good practice is to encapsulate your state variables into an Accessor class which you can see below. The key class to look for is CounterState, this contains a property called TurnCount which is what we use in the main bot logic to track the number of turns the user has taken.

Running the chatbot!
So, from the top, our bot:
- Lets you enter a message
- Increments a TurnCount variable to track the “turn” you’re on
- Echoes back the message that you entered
- Waits for the next message
When you run the solution in Visual Studio, your web browser will launch to let you know the bot is running, at which point you can run the Bot Emulator. You’ll then be able to interact with it like this!
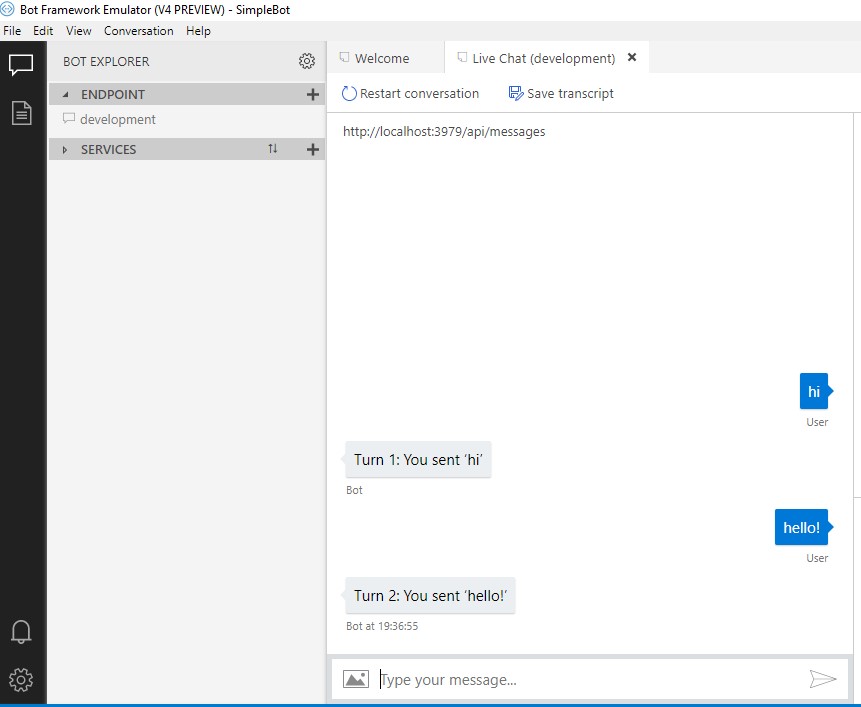
You’ve built your bot, now you can run the Bot Emulator and interact with your bot. Source: Microsoft
Obviously, this is very basic, but it shows you some of the main components you need to use to build bots using the Microsoft Bot Framework.
Summary
In this blog we’ve looked at the Bot Framework, some of its key components, how you can build and test chat bots, and looked at a sample application. In a future series of articles, we’ll look at building a bot that has more intelligence. A bot that can process human language using LUIS, extract entities in a sentence and redirect the conversation to the relevant dialogue.
You can find all source code for this bot here.
Have you built anything using the Bot Framework? What has your experience been?
Grey Matter has a Managed Services team who are experts at managing Azure related projects. If you need their technical advice or wish to discuss Azure and Visual Studio options and costs, please call us on 01364 654100.
Contact Grey Matter
If you have any questions or want some extra information, complete the form below and one of the team will be in touch ASAP. If you have a specific use case, please let us know and we'll help you find the right solution faster.
By submitting this form you are agreeing to our Privacy Policy and Website Terms of Use.
Jamie Maguire
http://www.jamiemaguire.netSoftware Architect, Consultant, Developer, and Microsoft AI MVP. 15+ years’ experience architecting and building solutions using the .NET stack. Into tech, web, code, AI, machine learning, business and start-ups.
Related News
Cloud Adoption Framework: how to migrate to the cloud
Ready to learn about the next stage in your cloud adoption journey? Episode three of our Azure 101 series is out now. You know all about the Strategy phase of Microsoft’s Cloud Adoption Framework, now learn about the Planning phase. ...
[WEBINAR] Accelerating agile: Scaling quality with AI and automation
AI is transforming app quality – will your team adapt or fall behind? AI is no longer on the horizon – it’s reshaping how dev and test teams work today. The question isn’t if you’ll adopt AI-driven testing, but how...
Update, migrate or re-develop – navigating application modernisation
Wed 4 June 2025 11:00 am - 12:00 pm GMT
We’re joining Black Marble on this webinar to discuss how application modernisation could be your key to staying one step ahead in an era of technological change. Explore the benefits of application modernisation Modernisation can help you achieve greater efficiency,...
GitHub Copilot: how to harness the power of AI for developers
Wed 28 May 2025 11:00 am - 12:00 pm GMT
Tune in to this webinar as we join Black Marble to discuss how you can get GitHub Copilot working for you. Discover more about GitHub Copilot Enhanced productivity. Improved code quality. Free up time to do what you do best....